


An LED wall processor takes your video source and converts it into the signal your LED panels can display. To choose one, work out your wall’s total pixel count, match it to the processor’s pixel capacity and port count, then check that it has the inputs, scaling and redundancy your use case needs. Skip a step and you get black screens, tearing, or a box you outgrow within a year.
In our experience, a lot of “faulty panel” complaints turn out to be processor problems. This guide covers how to size a processor for an LED video wall, what the settings do, and what to budget in India.
What Is an LED Wall Processor?
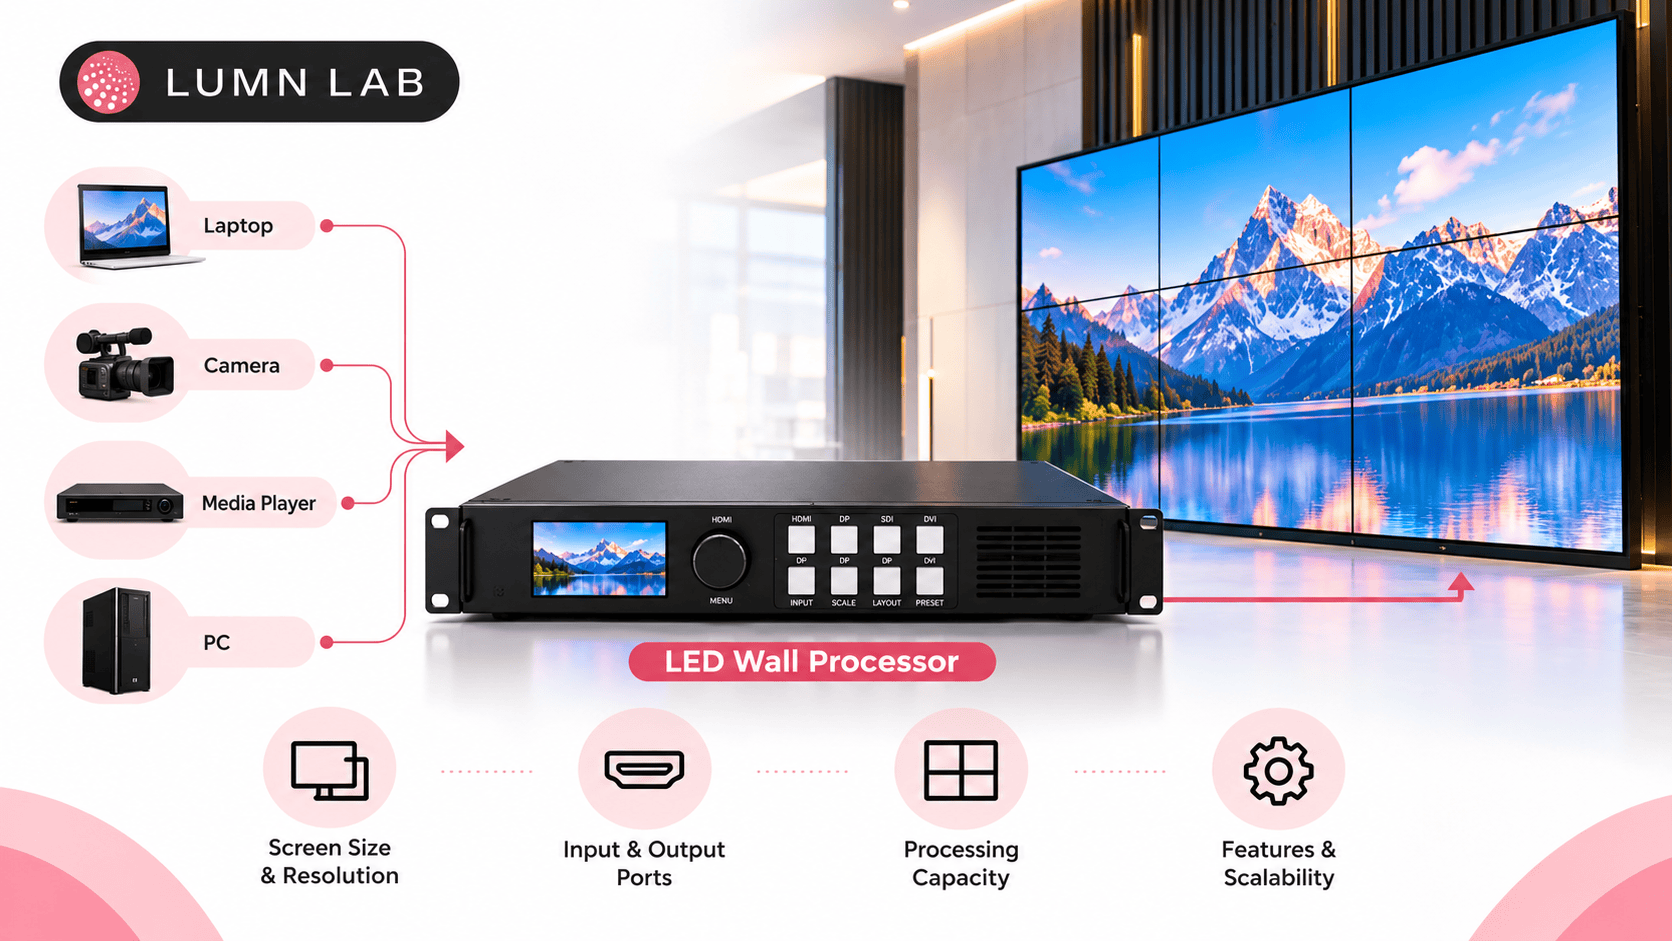
An LED wall processor (also called an LED video wall processor or video wall processor) is the device between your content source and your LED cabinets. It scales the incoming video to your wall’s exact resolution, splits it across network ports, and manages color, brightness and switching.
What do you need for a video wall?
Five things:
- LED cabinets with receiving cards
- A processor or sending box
- Source devices (media player, laptop, camera or switcher)
- Cabling: Cat6 for data, HDMI/DVI/SDI/DisplayPort for inputs
- Power distribution and a structure to mount on
Think of the processor as a translator. The panels only understand their own pixel grid. The processor makes sure your 1080p video, laptop screen and camera feed all fit that grid properly.
How to Choose an LED Wall Processor: 6 Factors
1. Pixel Capacity: The Sizing Step
Every processor has a maximum pixel load. Your wall must fit under it.
The formula:
- Pixels wide = wall width (mm) ÷ pixel pitch (mm)
- Pixels high = wall height (mm) ÷ pixel pitch (mm)
- Total pixels = wide × high
Reference points: Full HD is 2,073,600 pixels and 4K is 8,294,400.
| Wall | Pitch | Approx. pixels | What it needs |
|---|---|---|---|
| 10×10 ft storefront | P4 | ~0.58 million | One port, a compact controller |
| 4 m × 2.25 m lobby wall | P2.5 | ~1.44 million | 3 ports minimum, mid-range processor |
| 3.2 m × 1.8 m control room wall | P1.5 | ~2.56 million | 4+ ports, plan for 6 |
| 4K-resolution wall | any | 8.29 million | 13+ ports, high-end processor |
For viewing-distance and display sizing guidance, AVIXA’s display design standards are the industry reference most integrators follow.
A 10×10 ft P4 wall, like our HOCCO Ice Cream storefront in Delhi, sits comfortably inside one port’s capacity. Fine-pitch walls are where sizing gets tight, because shrinking the pitch multiplies the pixel count fast.
Our rule of thumb: leave 20-30% spare capacity. Walls get extended, and content gets sharper.
2. Ports and Cable Layout
Each Gigabit Ethernet output carries roughly 650,000 pixels at 8-bit color and 60 Hz. Higher bit depth or refresh rates reduce that. Always confirm against the data sheet of the exact model.
Divide your pixel count by 650,000, round up, then add one for headroom. That is your minimum port count.
Ports also decide how you cable the wall. Sections wired to separate ports can be isolated when something fails, which makes fault-finding far quicker on large installations.
3. Inputs and Scaling
Which sources will actually feed the wall? Match the processor to the answer:
- HDMI or DVI: laptops, media players, signage CMS boxes
- SDI: broadcast cameras, studios, live events
- DisplayPort: high-resolution workstations
- Multiple layers or windows: control rooms, corporate dashboards, event stage mixing
If you only play one looping video, a basic controller is enough. If you want a camera feed, a presentation and a ticker on screen together, you need a multi-window processor with proper scaling.
4. Refresh Rate, Bit Depth and Latency
For offices and retail, standard refresh and 8-bit color work well. Cameras are different. If the wall will be filmed or streamed, you need processing that supports high refresh rates and low latency, or you will see flicker and banding on camera. Live events and broadcast studios should treat this as a core spec, not an extra.
5. Redundancy and Control
Ask what happens if the processor dies mid-event. High-stakes setups (control rooms, broadcast, large launches) should have a backup processor or input redundancy. A retail loop playing from a media player rarely needs it.
Also check how it is controlled: a front panel, a browser interface, or PC software. Pick the one your operators will actually use.
6. Brand, Support and Local Service
Which processor is best for LEDs? There is no single winner, because the best LED video wall processor is the one that fits your pixel load, inputs and budget. Established names such as NovaStar, Color light and Brompton cover everything from compact controllers to high-end broadcast units. What matters just as much is whether your integrator can configure it, calibrate it and support it after handover.
Local support matters. A processor fault on a launch day is not the time to wait for a part to ship from overseas. Our teams support clients across Delhi NCR, including Gurgaon and Noida, as well as Mumbai and Bangalore.
LED Wall Processor Price in India
How much does an LED wall processor cost in India? Prices vary widely with pixel capacity, inputs and brand. The ranges below are market estimates, not quotes, so confirm current pricing with your supplier.
| Tier | Typical use | Estimated price (INR) |
|---|---|---|
| Basic sending box / controller | Small walls, single input, storefronts | ₹15,000 – ₹50,000 |
| Mid-range video processor | Corporate lobbies, retail, mid-size walls | ₹60,000 – ₹3 lakh |
| High-end multi-layer processor | 4K walls, broadcast, rental, control rooms | ₹3 lakh – ₹15 lakh+ |
Three things move the LED video wall processor price in India:
- Pixel capacity and ports: more pixels, higher price
- Input types: SDI and multi-window scaling add cost
- Redundancy: a backup unit roughly doubles the processor budget
The processor is usually a small slice of the total project cost, so do not cut corners here. A cheap processor on an expensive wall is the wrong place to save.
LED Wall Processor Setup and Settings
How to use an LED wall processor: connect your source to the input, connect the processor outputs to the LED cabinets with Cat6 cable, load the wall’s configuration file, then calibrate color and brightness.
LED wall processor setup, in order:
- Mount the cabinets and wire power and data first
- Connect source to processor, and processor to the first cabinet port
- Set the output resolution to match the source
- Configure the wall layout (columns, rows and port assignment)
- Run a test pattern to catch dead lines or cabling errors
- Calibrate brightness and color across the whole wall
LED wall processor settings that matter most:
- Brightness: set for the room. An indoor lobby needs far lower output than an outdoor wall. See our LED brightness guide for target levels
- Colour temperature and gamma: keeps whites neutral and shadows clean
- Refresh rate: raise it if the wall will be filmed
- Input scaling: point-to-point for crisp text, fit-to-screen for video
- EDID and resolution: wrong values here are a common cause of no-signal faults
Most of these are set once at commissioning. This is why proper installation and calibration matters as much as the hardware itself.
Get the Processor Right Before the Wall Goes Up
Choosing an LED wall processor comes down to four questions: how many pixels, how many ports, which inputs, and what happens if it fails. Answer those honestly and the rest follows.
Lumn Lab has delivered 1,000+ LED installations since 2015, with BIS and ISO certified manufacturing, supporting clients across India including Delhi NCR, Gurgaon, Noida, Mumbai and Bangalore. If you want a processor specified for your exact wall, request a free consultation and we will size it with you.
Get the Right LED Wall Processor for Your Wall
Wrong processor, wrong picture. Send us your wall dimensions and pixel pitch, and our team will size the processor, ports and inputs for you. 1,000+ installations since 2015.
Frequently Asked Questions
What is a video wall processor?
A video wall processor is a device that takes one or more video sources, scales them to the wall’s resolution and sends the image to the display panels. For LED walls, it splits the picture across network ports and controls brightness, color and layout.
What is a LED processor?
An LED processor is the control unit that converts video input into data your LED cabinets can show. It scales the image to the wall’s exact pixel grid and manages color, brightness and input switching.
What is the best processor for a video wall?
The best processor is the one that matches your wall’s pixel count, input types and uptime needs. Compact controllers suit small storefront walls. Multi-window processors from brands like NovaStar, Color light or Brompton suit lobbies, control rooms and broadcast.
Which processor is best for LEDs?
There is no single best. For a small retail wall, a basic sending box works. For a 4K, camera-facing or multi-source wall, choose a high-end processor with enough ports, SDI input and low latency.
What do you need for a video wall?
You need LED cabinets with receiving cards, a processor, a video source, Cat6 and input cables, power distribution and a mounting structure. Larger walls also benefit from a backup processor.
How do I size an LED wall processor?
Multiply the wall’s pixel width by its pixel height, then divide by about 650,000 pixels per Gigabit port. Round up, add one port, and keep 20-30% spare capacity. Verify the figure against the data sheet of your chosen model.
How much does an LED wall processor cost in India?
As a market estimate, basic controllers cost roughly ₹15,000-₹50,000, mid-range processors ₹60,000-₹3 lakh, and high-end units ₹3 lakh-₹15 lakh or more. Request a quote for current pricing.
How do I set up an LED wall processor?
Connect the source to the processor, link the processor to the cabinets with Cat6, set the output resolution, load the wall layout, run a test pattern, then calibrate brightness and color.
Keep Reading